Autofix
This feature allows you to fix issues by selecting critical rules to help resolve issues more efficiently and accurately.
Follow these steps to use Autofix feature:
Detect Autofix Violation
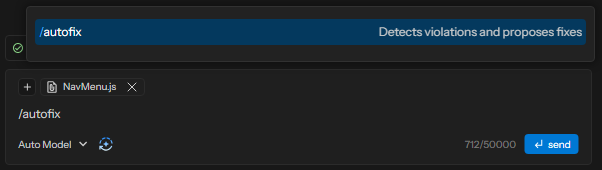
Step 1: Use the action command /autofix in the prompt input box.
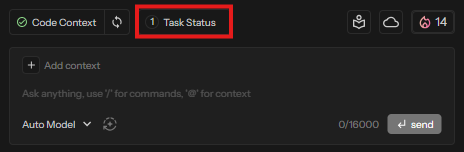
Step 2: Click “Task Status” button to check the Identified Task list.
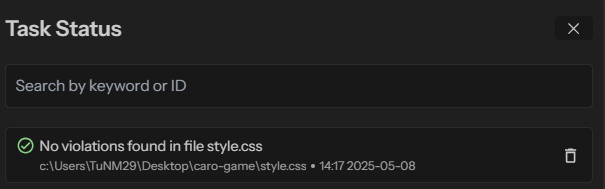
No violation detected cases
The system displays “No violations found in <File Name>!” as below:
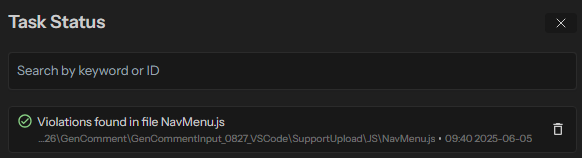
Violation detected cases
The system displays “Violations found in <File Name>” as below:
Step 3: Select a “Violations found in <File Name>” to check details of violations line(s).
Step 4: Select the violation & click “Propose refactors” to propose refactors.
The violations are categorized into the following sections:
- Exclusive Tasks (Single Select) – Users can select only one rule from this section at a time.
- Batch Tasks (Multiple Select) – Users can select multiple rules simultaneously from this section.
- Informative issue – Which works like a warning, and they are unavailable for selection.
However, you can only select violations from one section at a time. If a rule from one section is selected, the other section becomes unavailable for selection.
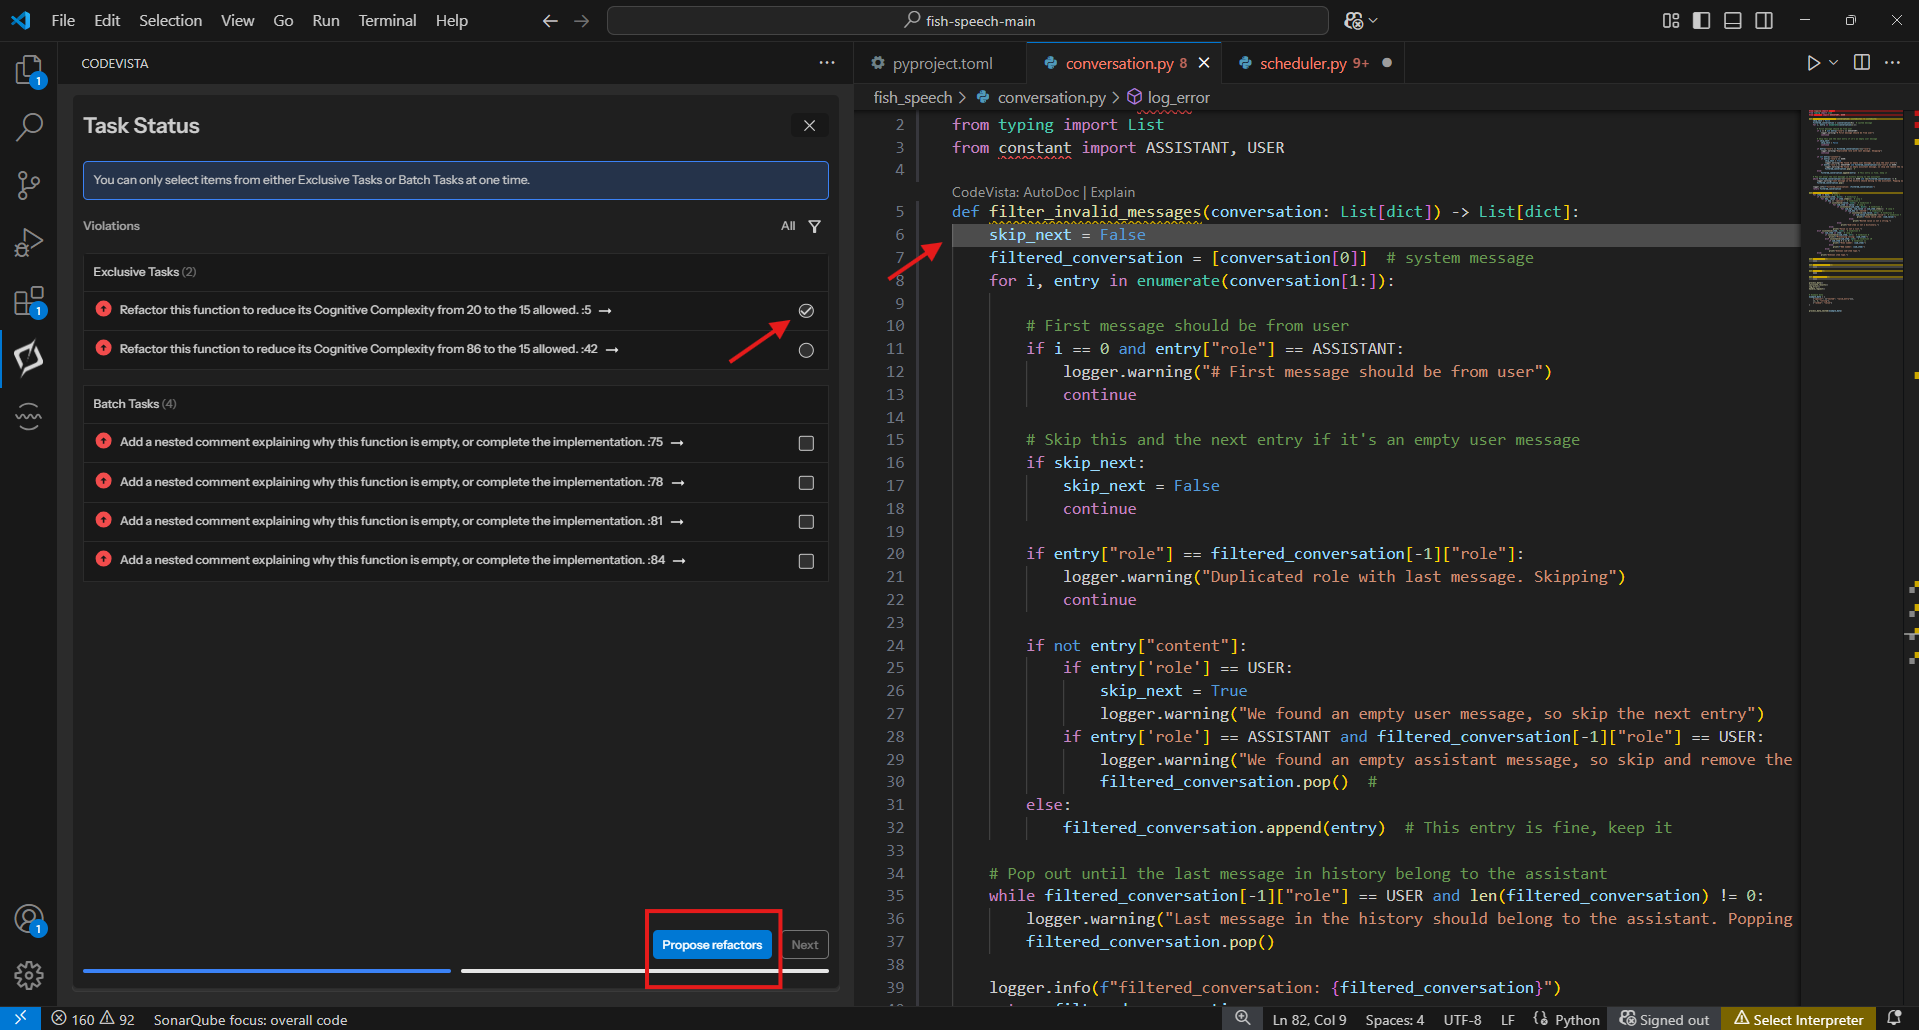
Note: You can select/deselect violations and propose again in step 5.
Step 5: After proposing refactors, click Next and Apply refactor to confirm applying the solutions for the violation to your current file.
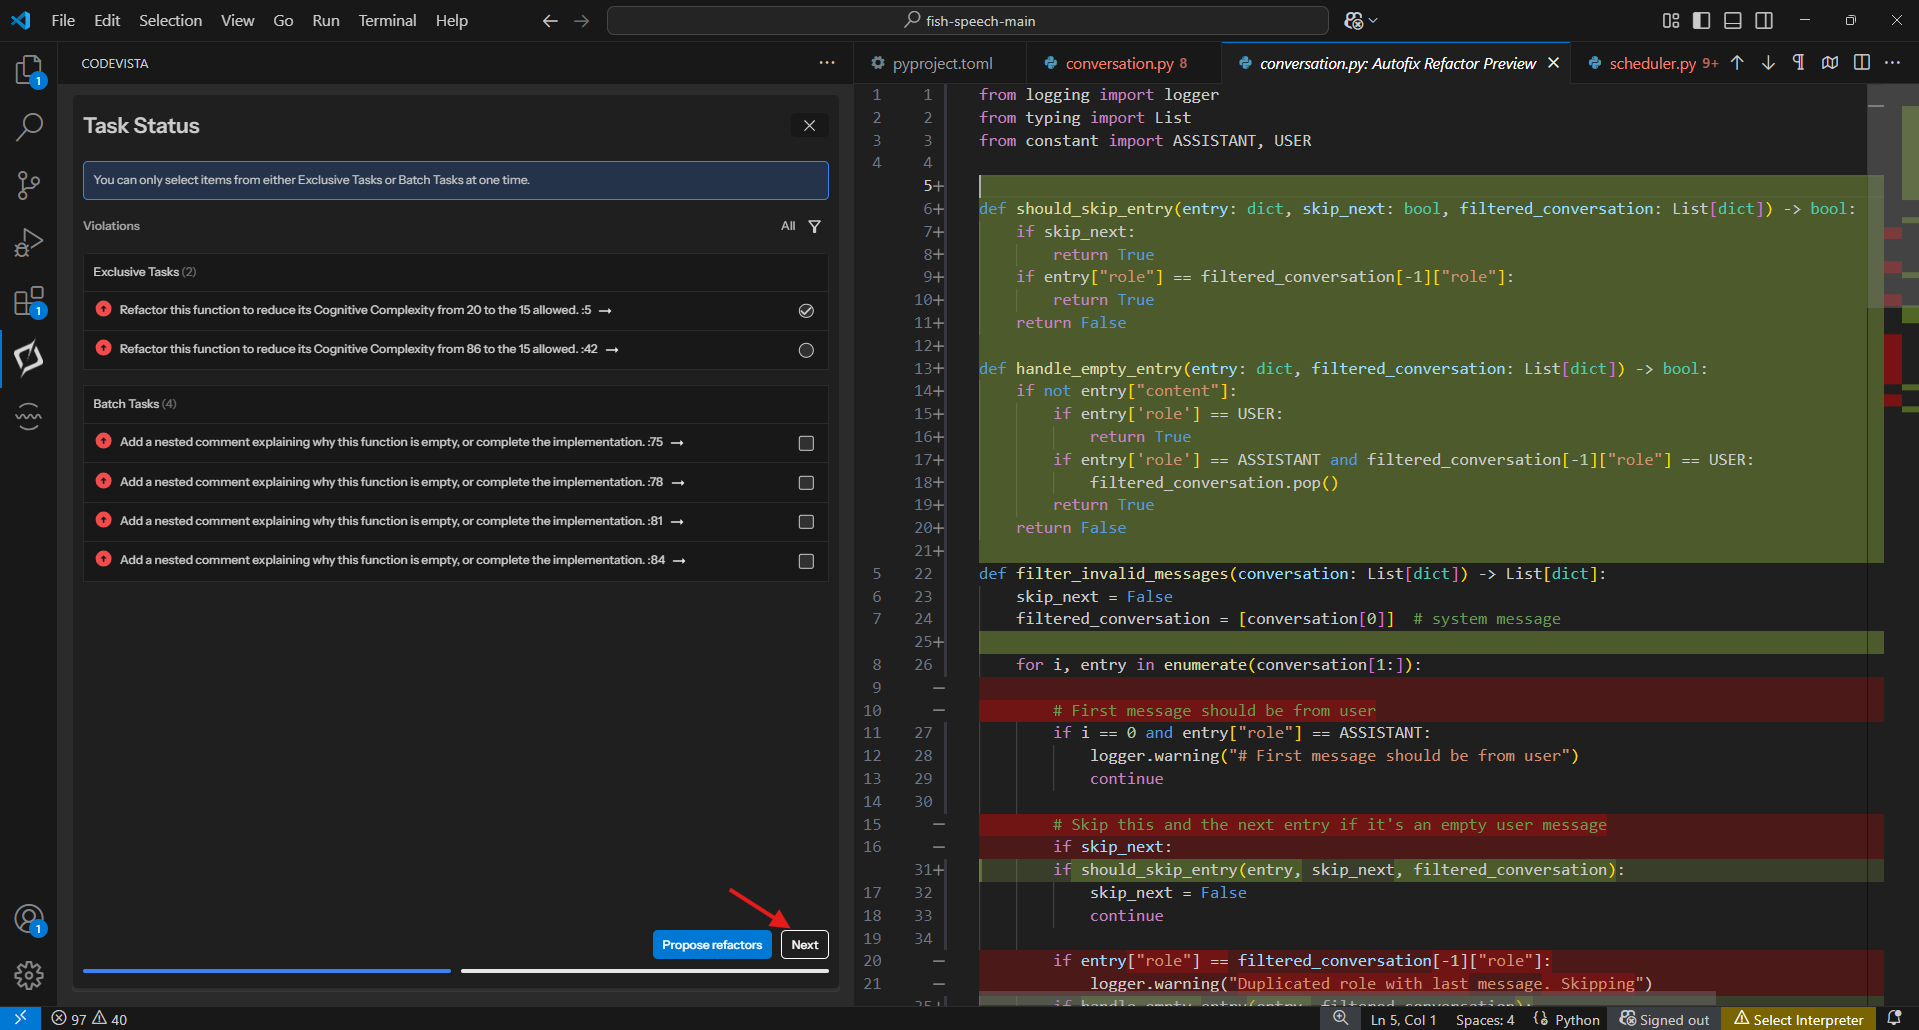
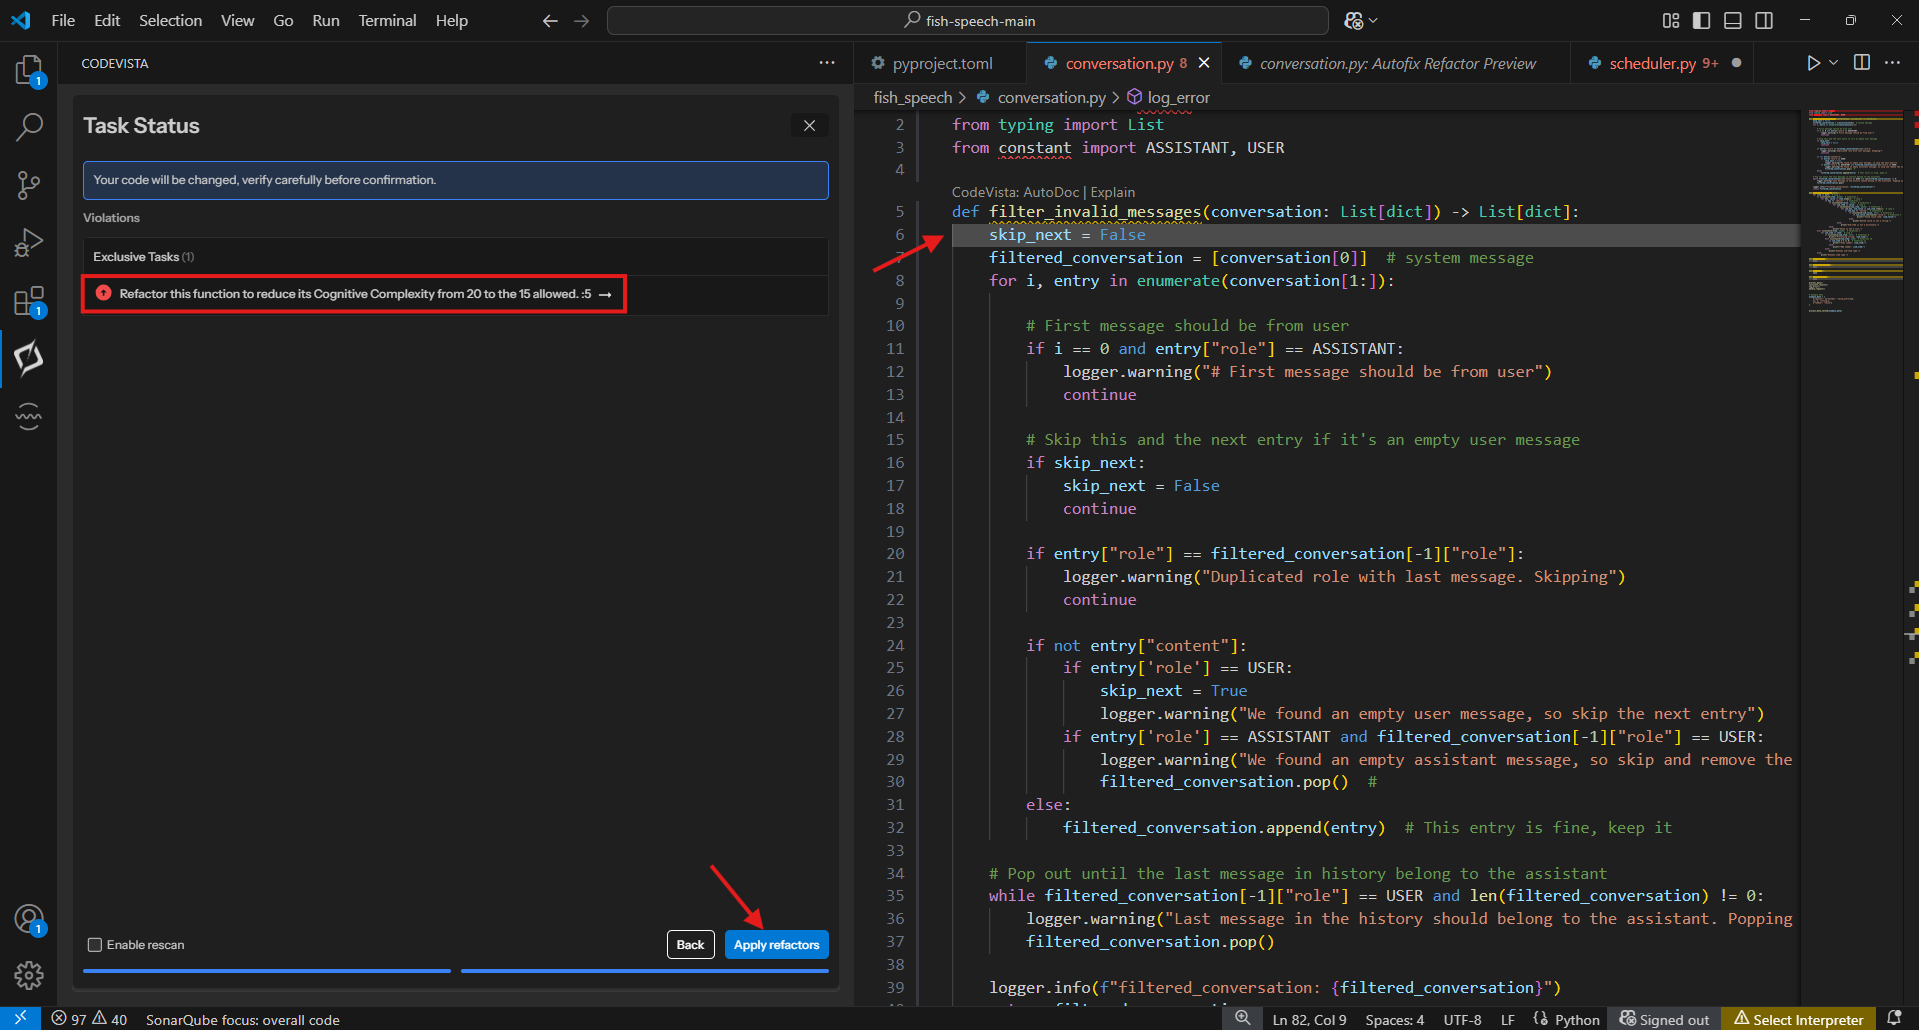
Remember to review and verify the suggested refactor solution for violation before applying them to ensure they align with your intended functionality.
Note: After applying a refactor, user can choose to rescan a file and continue fixing issues.
