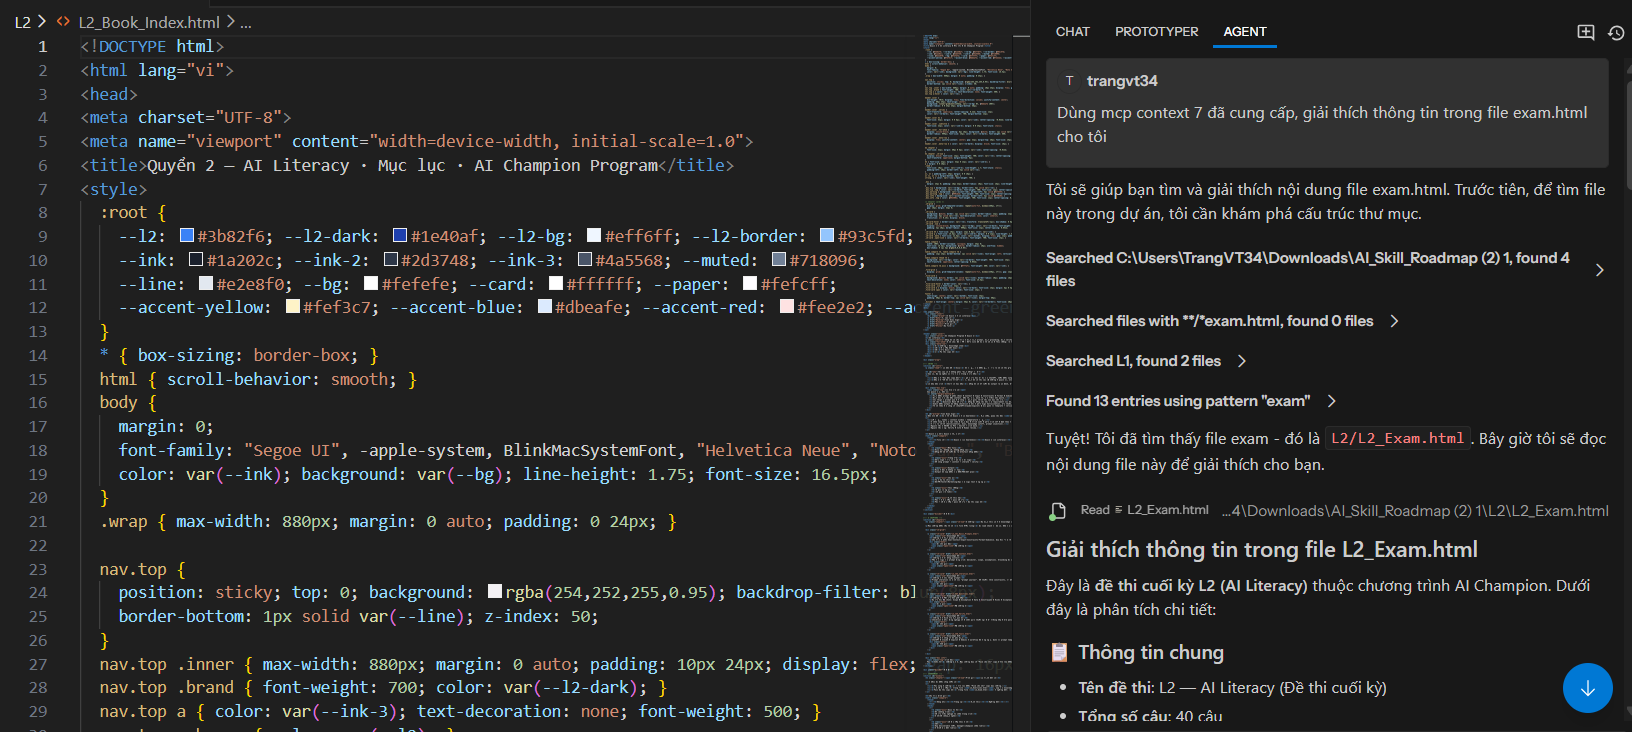
MCP server
MCP (Model Context Protocol) allows CodeVista to connect to MCP Servers (external services/tools) to extend the AI capabilities in CodeVista, for example:
- Access internal data sources/tools (repositories, documents, APIs, databases, etc.) through an MCP server.
- Add tools so CodeVista can perform automated tasks (lookup, summarization, API calls, information processing, etc.).
- Customize per team/project needs: each MCP server can represent a dedicated set of tools.
Security note: MCP tools can access and transmit data. Only enable trusted servers and keep them within the appropriate scope.
Access MCP Server Settings
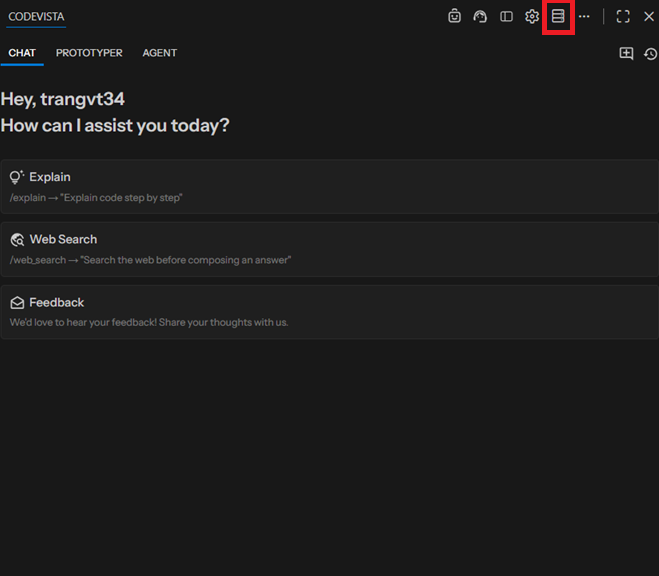
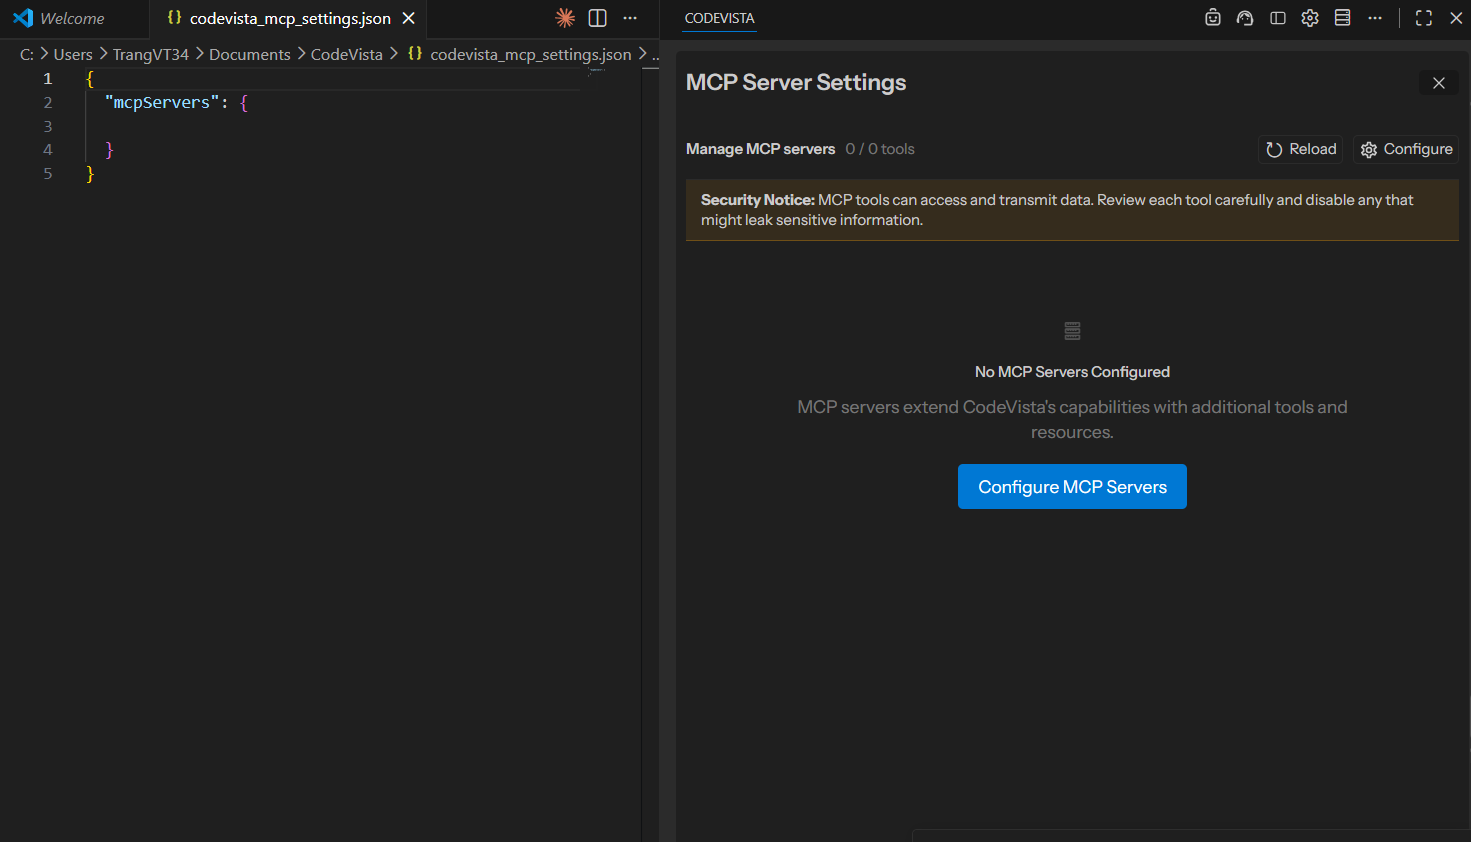
The MCP Server Settings interface will appear as shown below:
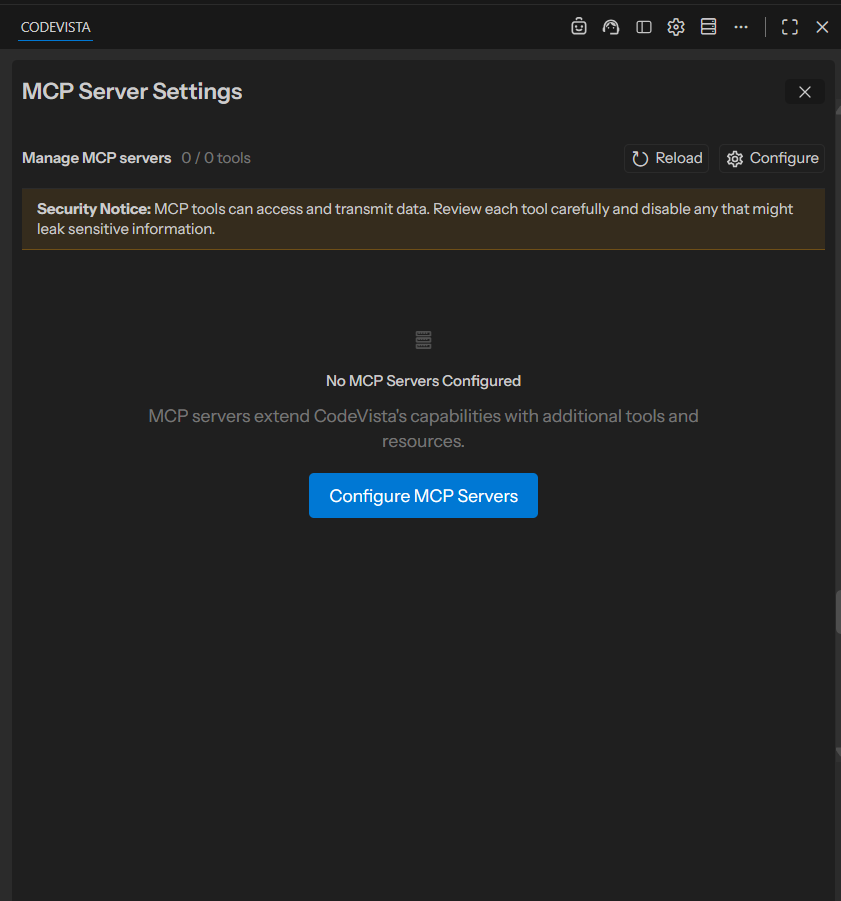
Configure MCP Servers
You can start configuration in either of these ways:
- Click Configure (top-right), or
- Click Configure MCP Servers (center button)
After clicking, CodeVista opens the configuration file in the left editor tab:
codevista_mcp_settings.json
Add MCP server
Add one or more server entries under mcpServers using the configuration format required by your MCP server.
Example:
{
  "mcpServers": {
    "context7": {
      "type": "http",
      "url": "https://mcp.context7.com/mcp",
      "headers": {
        "CONTEXT7_API_KEY": "PASTE_YOUR_CONTEXT7_API_KEY"
      }
    }
  }
}
Apply Changes (Reload)
- Edit and save
codevista_mcp_settings.json. - Open MCP Server Settings → click Reload (the tool count should update, e.g., to “2 tools”).
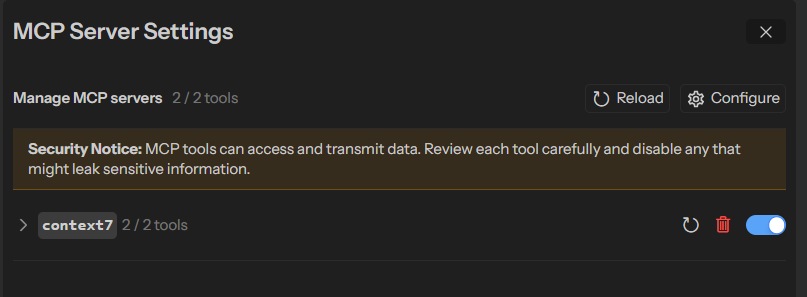
- Switch back to Prototyper/Agent mode → enter your prompt to invoke the MCP tool(s) and execute the user request.
Prototyper mode:
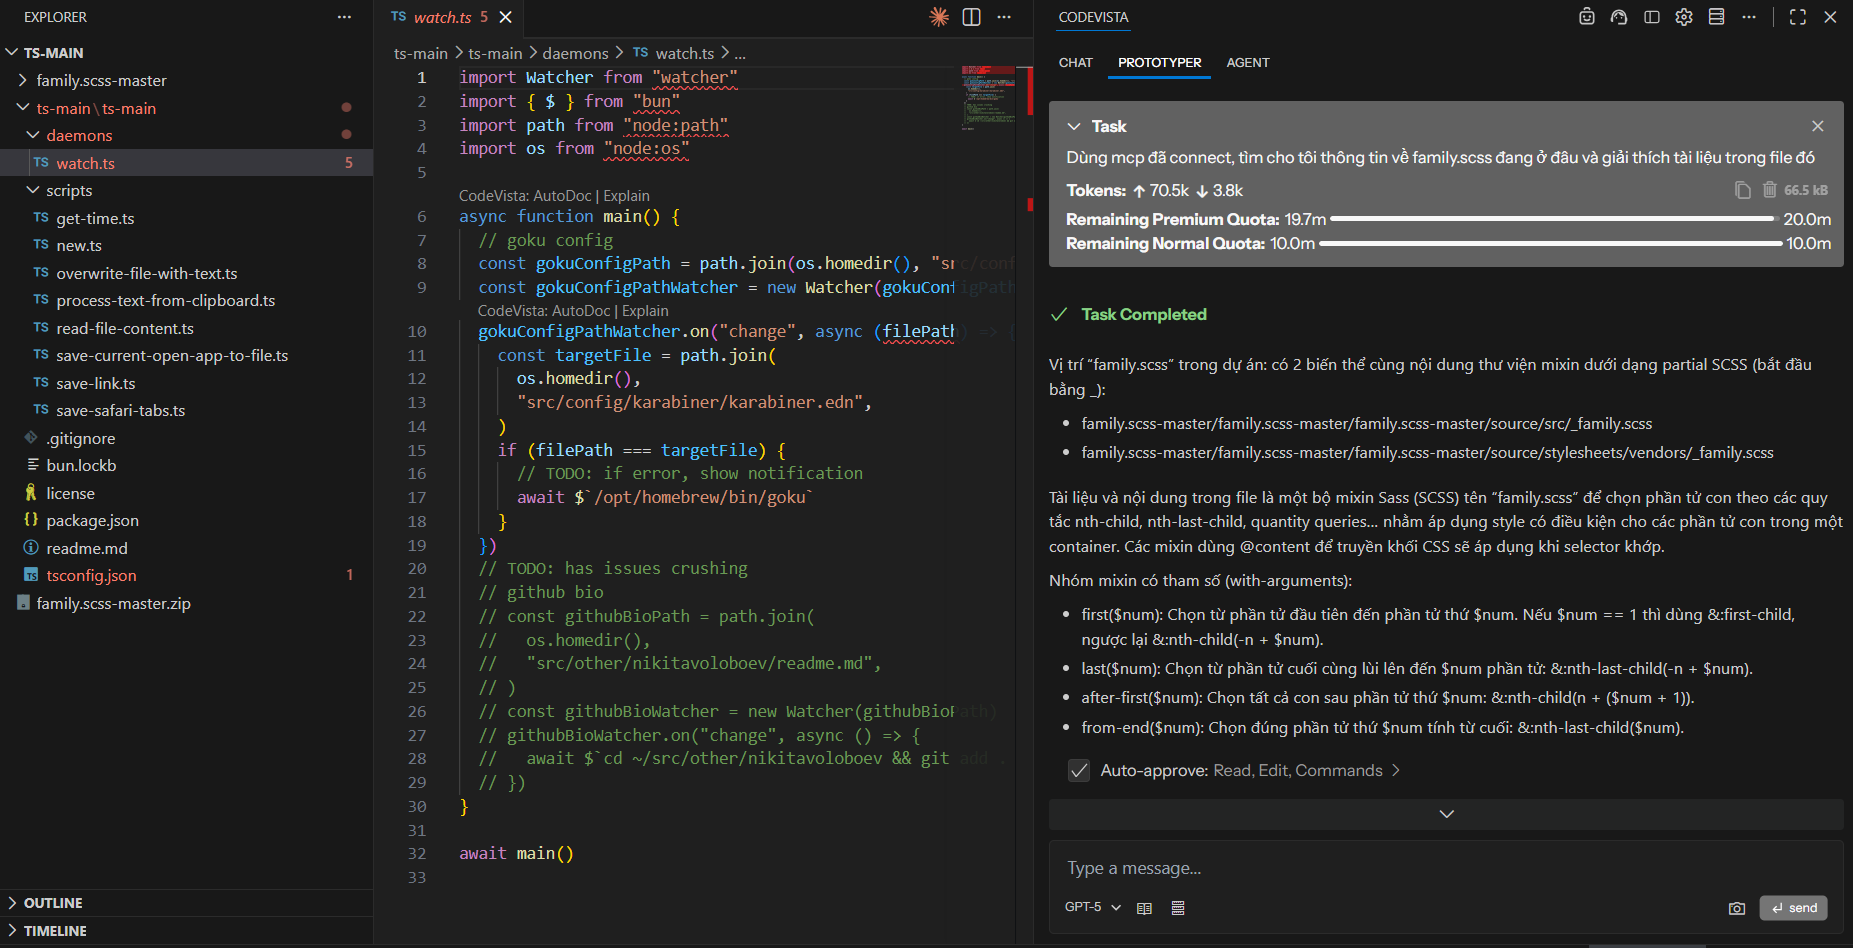
Agent mode: